Lenovo Lenovo Y460 notebook teardown cleaning grease full record
Poor car, rich table, reel play computer! As a qualified silk thread, it will not play the computer how to say in the past. In the third year I began to contact the computer, and I had already spent 15 years with my computer (who accidentally exposed my age). I didn't understand anything from the beginning, I changed my accessories, cleaned the dust, and repaired everything in the back. The number of zigzags can't be counted. Several desktops in the home had already been smashed. The notebooks that were detached from the earliest Acer 4520G, 4720G, to the Shenzhou Ship K660D, to Dell, Raytheon 911, were also considered disassembled. A few days ago, a friend said that I wanted to buy a computer to make me recommend the next cost-effective, and I decisively recommended on board. Suggested friend by the way old computer cooling does not work, playing a few LOL will be dropped crash various errors (I said how we always pit). There was a slight little space recently, let him take over to help him clear down and see if he can fight for another year.
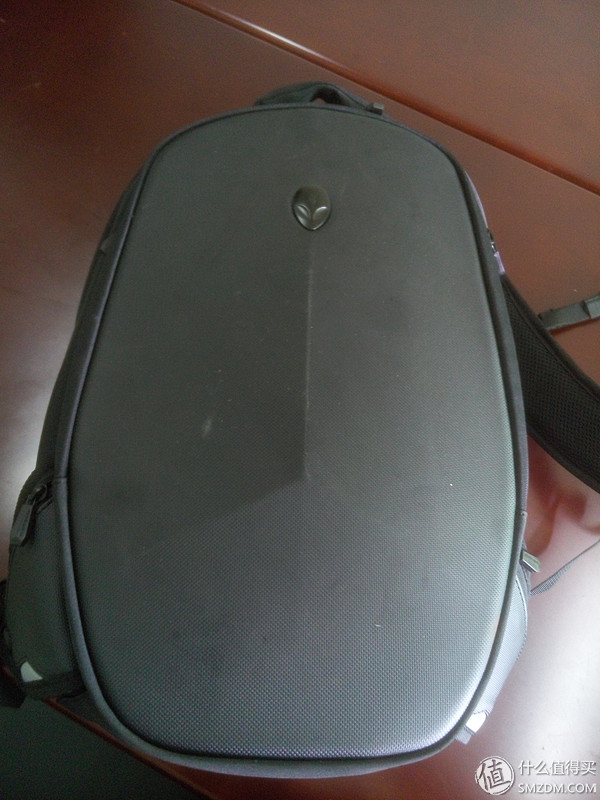

At first glance, I saw this package. Wow, this is not an alien. So many notebooks have never been dismantled by aliens. I do not know what is different. The work done by the aliens in this package is really good. The three zippers have large internal space, and each layer has a buffer layer to prevent crashes. It is not a big problem to put a 14-inch, a 15-inch and a 17-inch.
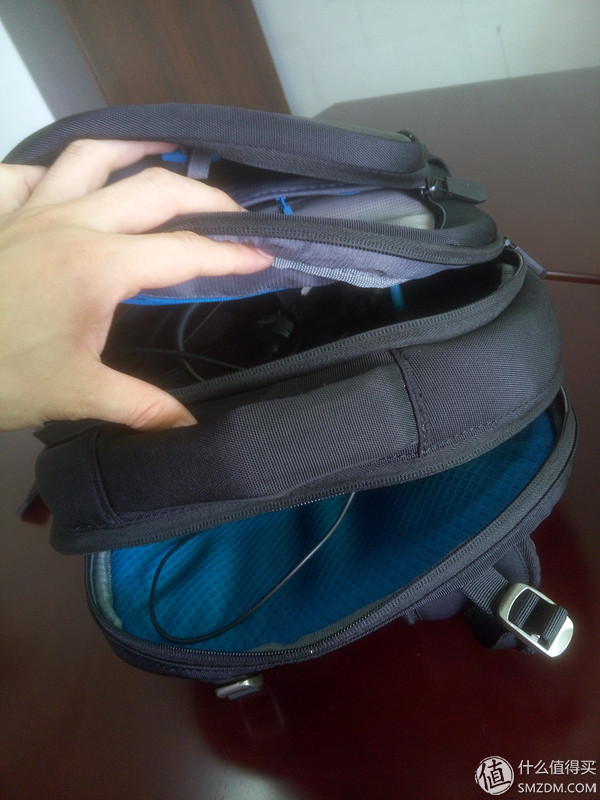 The actual trial, the first layer into the 14-inch, the third into the 15-inch, the middle of the power
 It was originally Lenovo, I think more
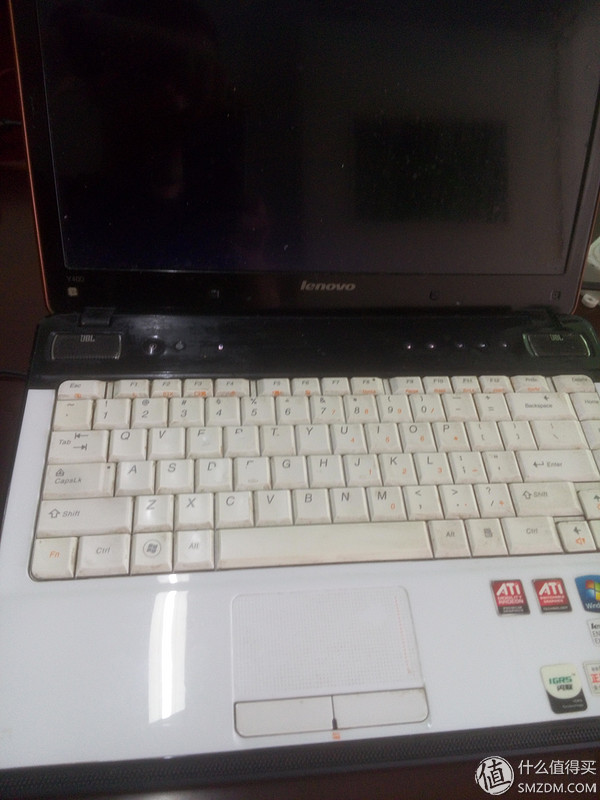
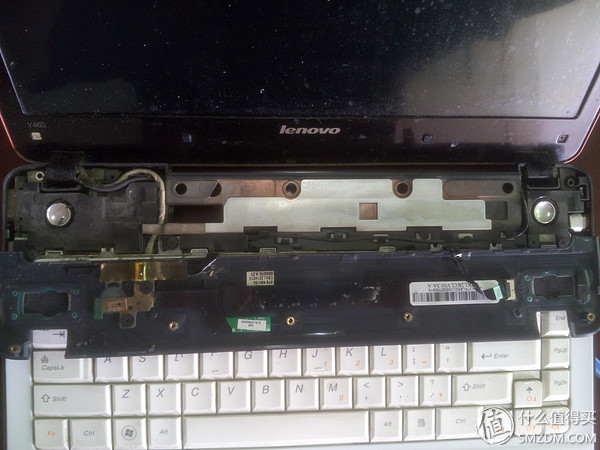
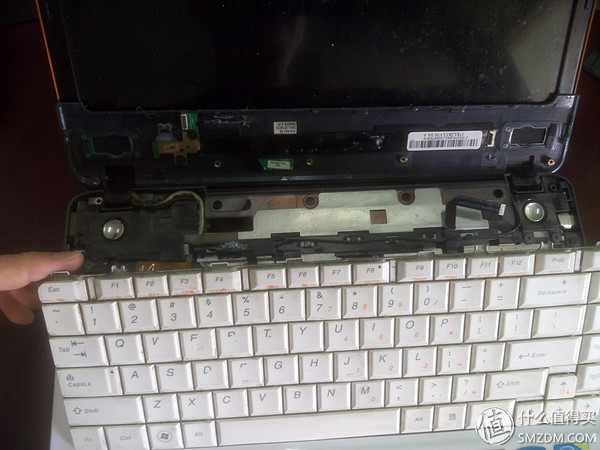
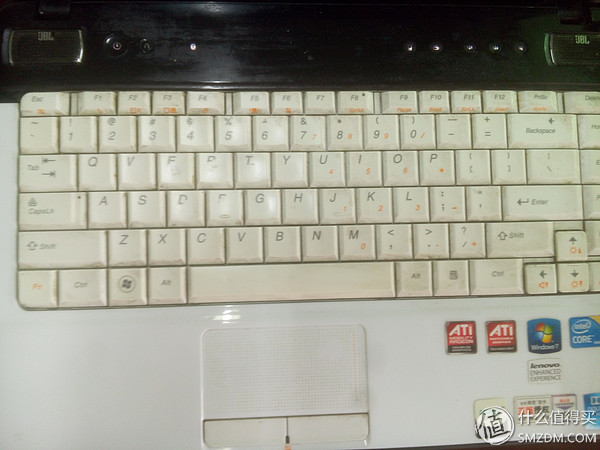 This keyboard and screen is a big experience
Under the boot operation, the temperature is indeed high, to open Kailu Master, 360 and other tools and software temperature over 90 degrees It is estimated that playing games over 100 degrees directly boot protection is also very likely to restart automatically. Want to find the wireless connection on the Internet, ask a friend that the wireless is broken, you let me feel then. Opened his own ship, Lenovo official website input machine code from March 2010 to protect, in March 2012 over security. Computers six years ago, it is understandable to change this way.
The following began to disassemble, first please disassemble N sets

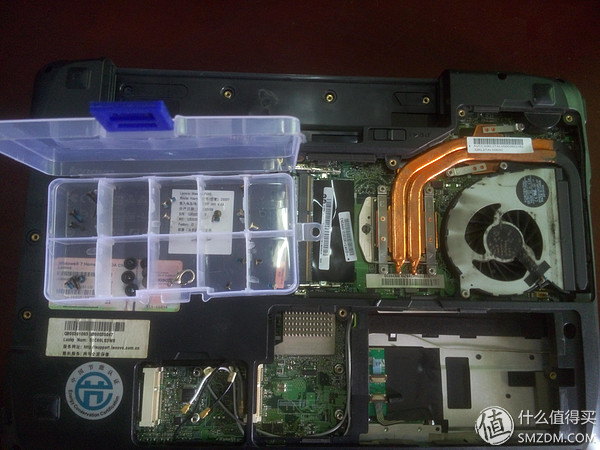
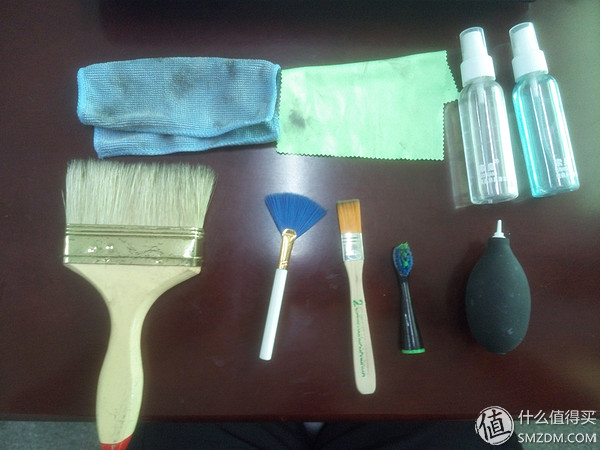
9.9 to buy, there are seven sets of clean, and then make up for their own point of entry, disassemble cleaning tools are placed inside.
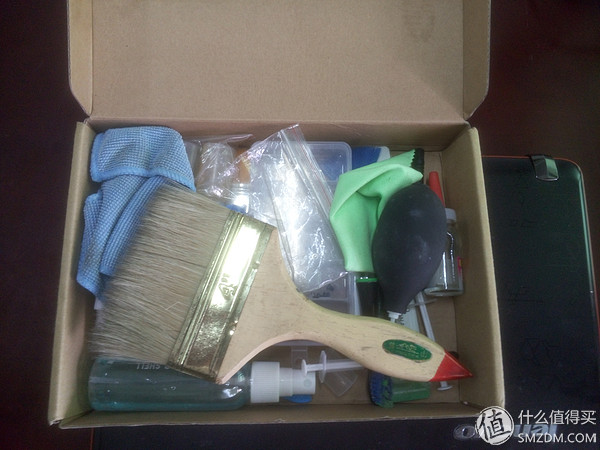
Wipe two pieces of cloth, clear two bottles of liquid, one large brush, two small brushes, one toothbrush, two silicone greases, two scrapers, four boring bars, two cymbals, two suction cups, one finger clevis Two bottles of lubricating oil, one screwdriver, 502 bottles (fortunately, there is this, and later on), one screw storage box, one scorpion, and one skin tiger all in this small box. Tool complete, start!
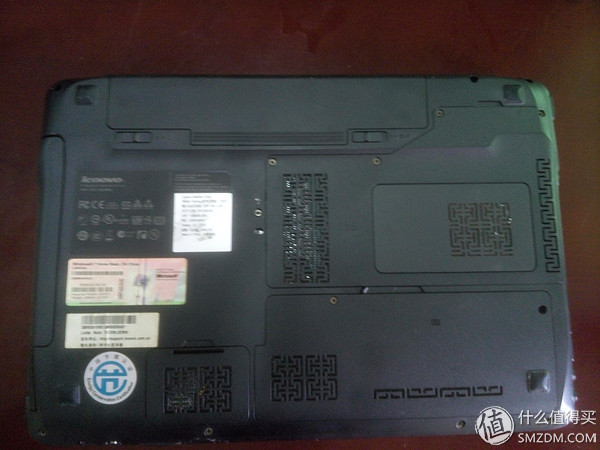 First reveal the chrysanthemum
Simply unscrew it with a screwdriver, (my disassemble level stays at this step for a long time, and I dare not and will not continue to remove it)
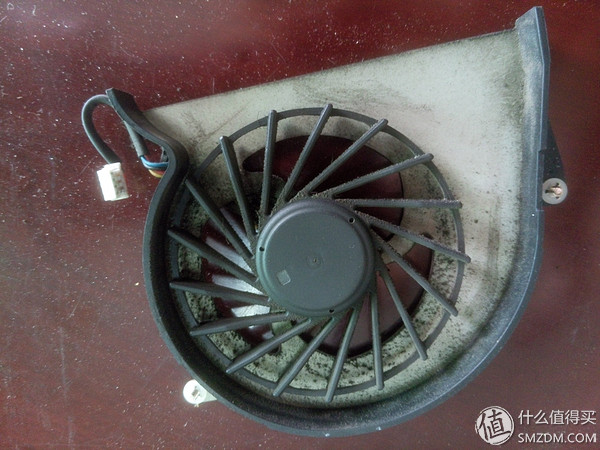
 The dust of the tuyere is good-looking and it is difficult to clean it.
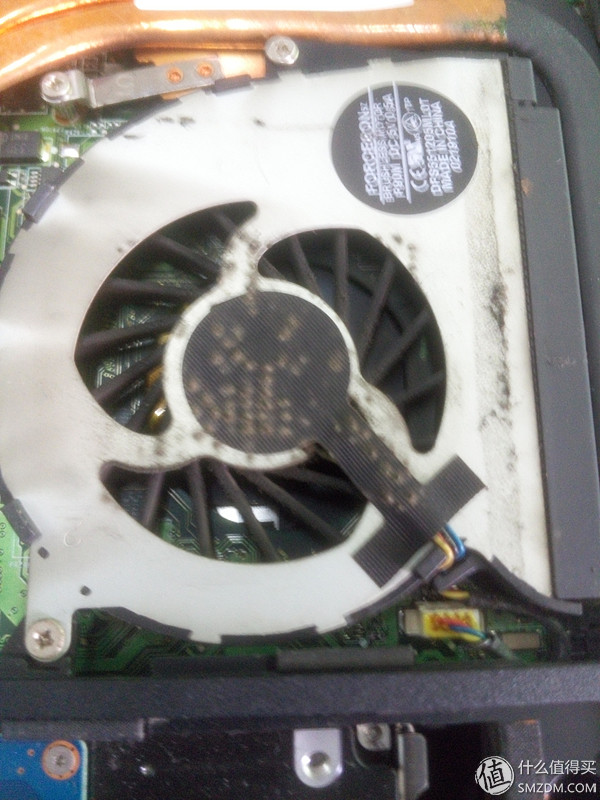 Look at this fan and you know where the heat is not going
 If you just want to upgrade, you'll be there
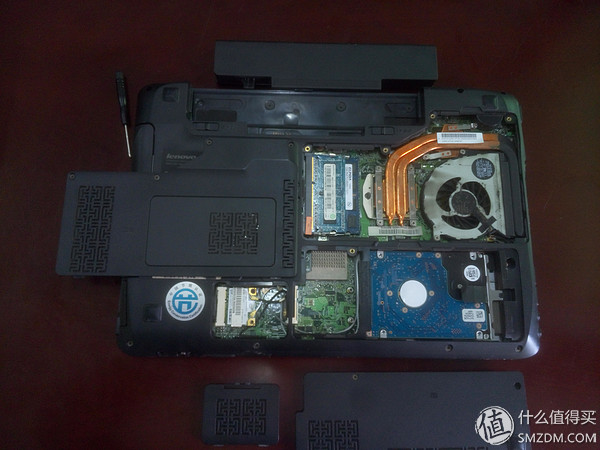
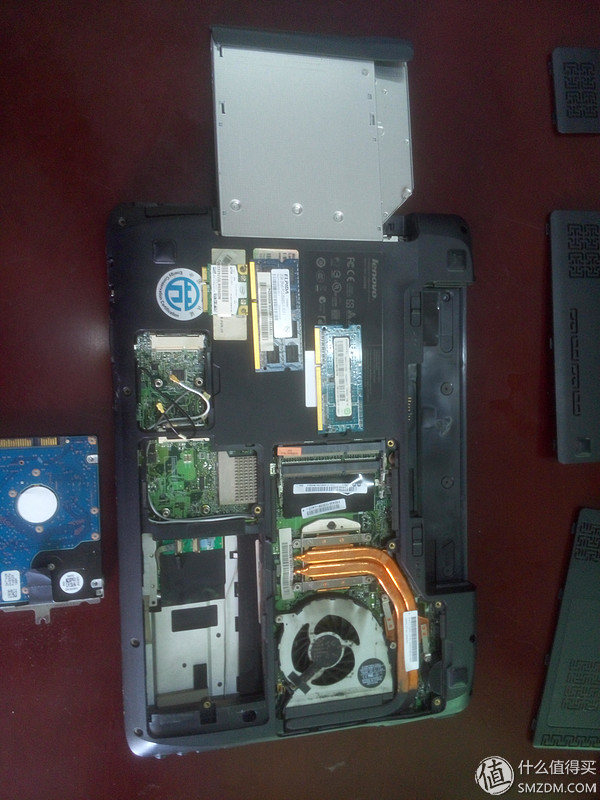
CPU I5 230M, ATI 5650M graphics card, memory 1333 original 2G, and later do not know where to come 1066 quasi-brand 1G, composed of 3G memory, hard disk 320G (Lu master has been reported to caution careful damage) really is the mainstream configuration in 2010 ah.
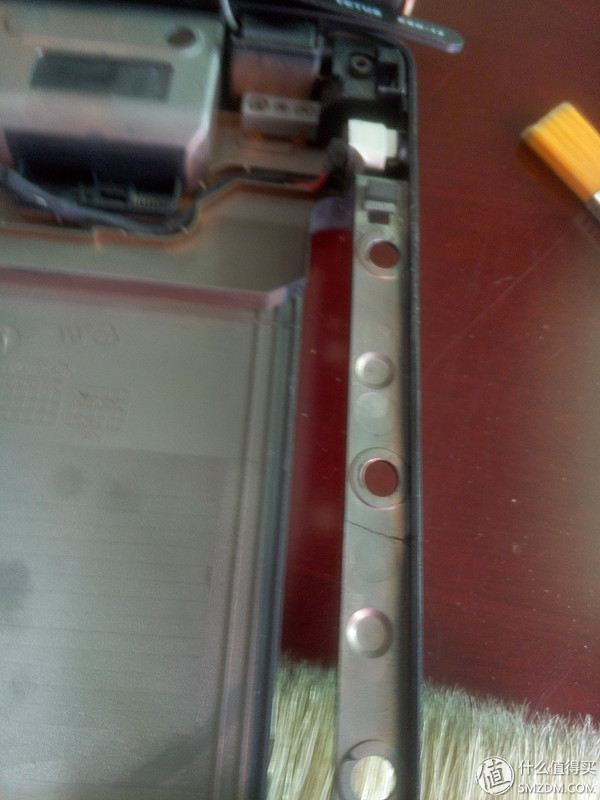
 Remove the visible screws and separate them into storage boxes
Here is a little small advice, D surface screws are placed in the first two or three grids, C surface of the keyboard under the screw to put a grid, leaving the motherboard screws to put a grid, so when the back screw is not easy to make mistakes and omissions. (If the first disassembly, it is best to take a picture of each step, so that when you put it back, there will be no case where more parts will be installed.) The bottom of the basic split here, the following go to the front.
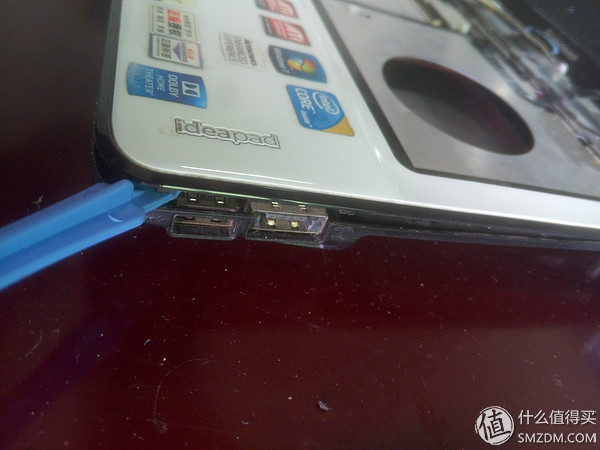
 One of the artifacts, the crowbar, when you didn't have a crowbar

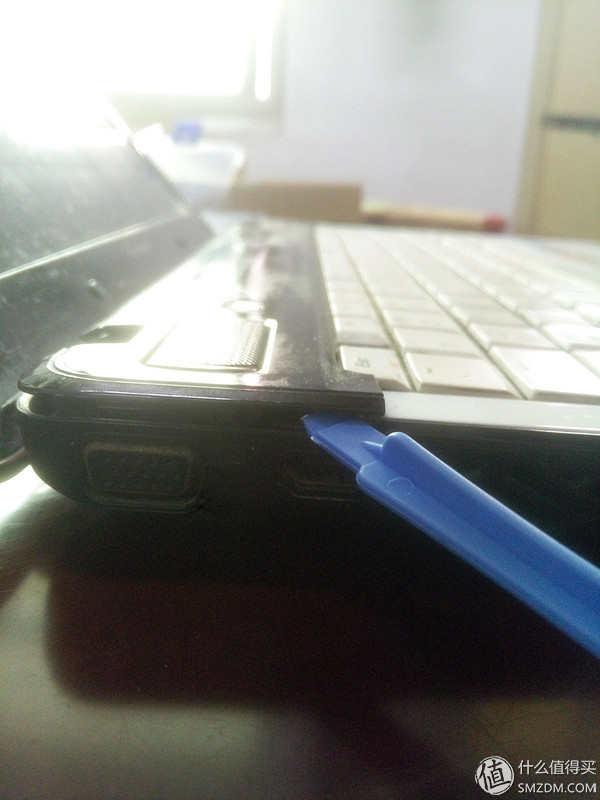
With the crowbar, the left panel, the right panel, and the right panel are all open and the power panel is easily separated.
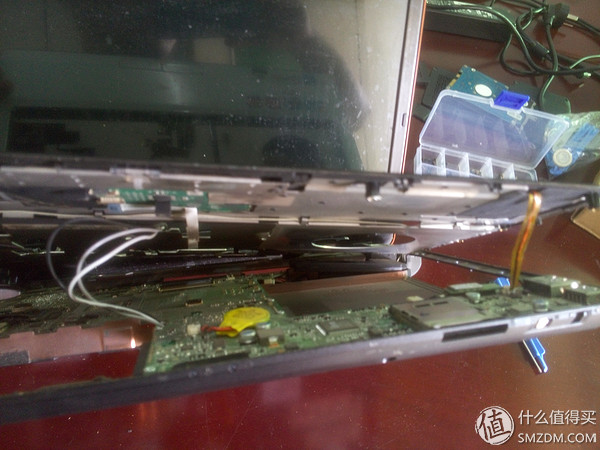
 Pay attention to the line when separating
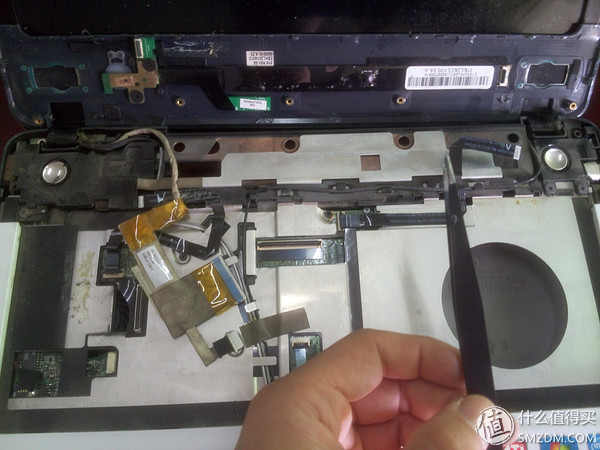
 Then you can separate the keyboard and pay attention to the cable
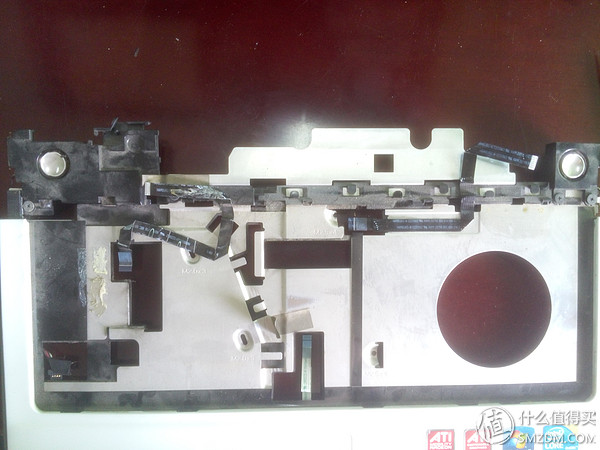
 This is really ugly
 The second artifact, a handful
The tweezers can suck screws, can be removed and the cable can also be pressed into the buckle first. A lot of features, disassemble necessary. Here we use tweezers to help open all visible cables.
 Twist off four C-face screws
 The crowbar comes again, one circle along the edge, and the C-plane is separated
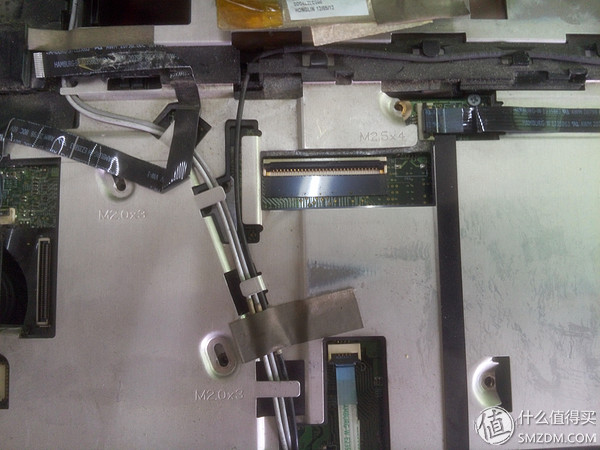
Do not know why, wireless network card has three lines, one is still covered with insulating sleeve. Here we must be absolutely careful, Lenovo has a hidden line in the bottom right corner, C surface D can not see, must be separated to see, very thin, a pull is easy to break, should be the button to switch the flight mode After the line is broken, it cannot be switched quickly.
 Take out the wireless network card carefully
It is also important to note here that it is best to take a photo at the wireless network card to prevent the positive and negative polarity of the device from being reversed.
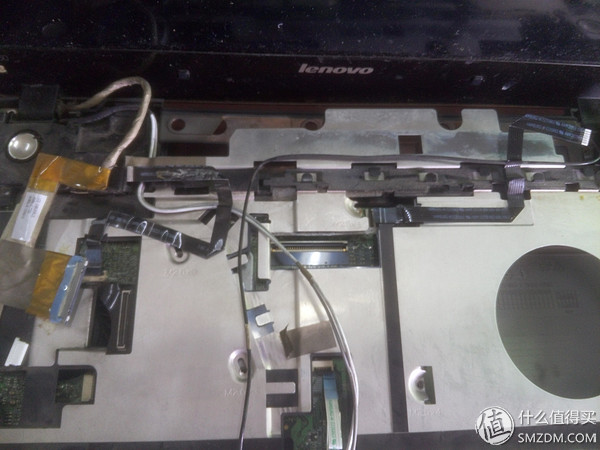
 C face finally cleared it can be separated
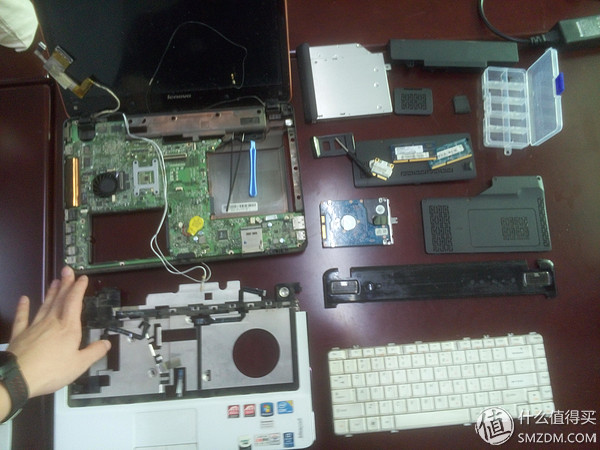 To this step basically can be disassembled
In fact, the motherboard has not been taken down, there will be a few screws, there is no difficulty. Someone suddenly knocked on the door at this time, and the leader said to check the health. I'll go to class. Isn't it for me to die?
 Clean with the fastest speed
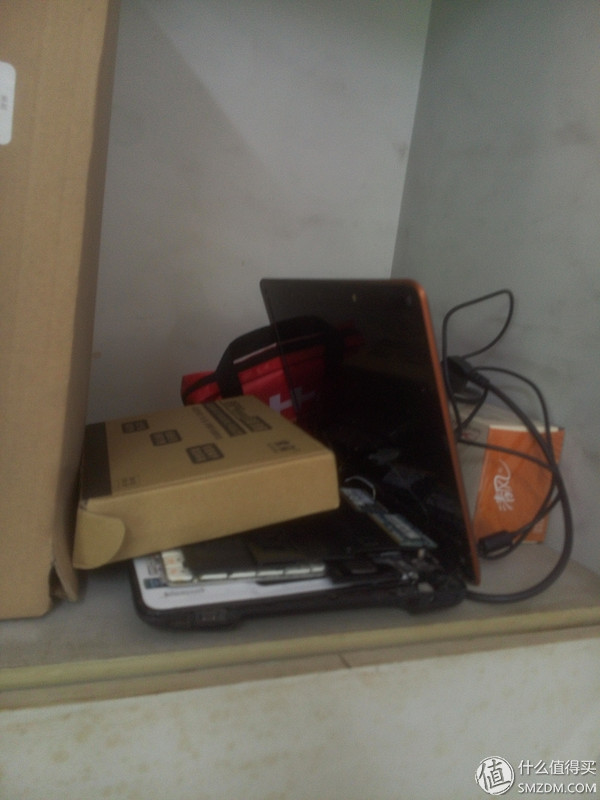 Stack it up and put it in the cabinet first
 Take out coffee and honey, make tea and make it look like it should go to work
Don't ask me why the glasses are purple. You have a prodigal wife who knows.
Well, waited for more than half an hour in the daze, the inspection finally passed, and the following continues.
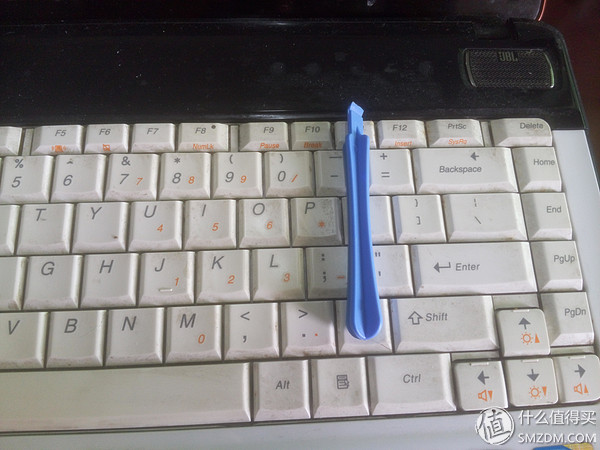
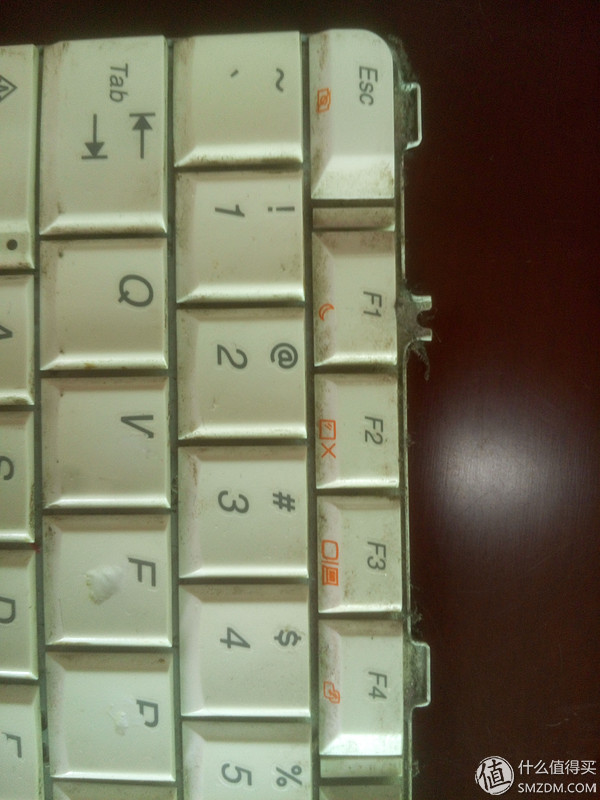 Clear the keyboard first
This keyboard is also dirty enough, dirt and dirt is too much, and then there is a layer of sticky feeling, I really dare not think what is on top of it.
Artifact III, the cleaning kit was launched. After half an hour of cleanup, it was barely clean.
 This outlet is only made by a small brush rake and leather tiger
Finally, remove the motherboard, remove the motherboard is careful of the baffle above the drive, a light pressure on the break, but fortunately there is a habit of carrying 502
 After sticking it is basically not visible
 After unscrewing two screws, the fan disengages, pay attention to the cable
The fan is not an ordinary inclined blade. It is a kind of straight blade. I don't know what difference this kind of design has, but I don't know if it will affect the volume of air.
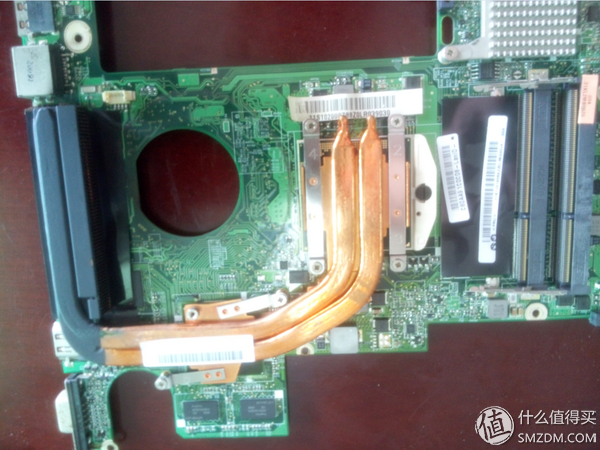
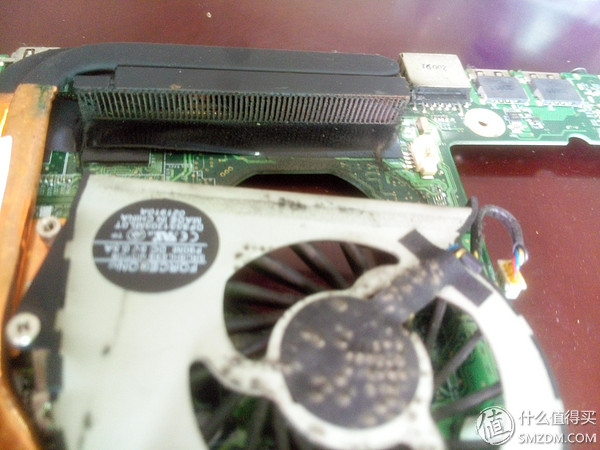
After the fans are separated, they can clearly see the heat dissipation components. It is said that Lenovo's workmanship is still good, and it is worthy of being the Y series of the main game.

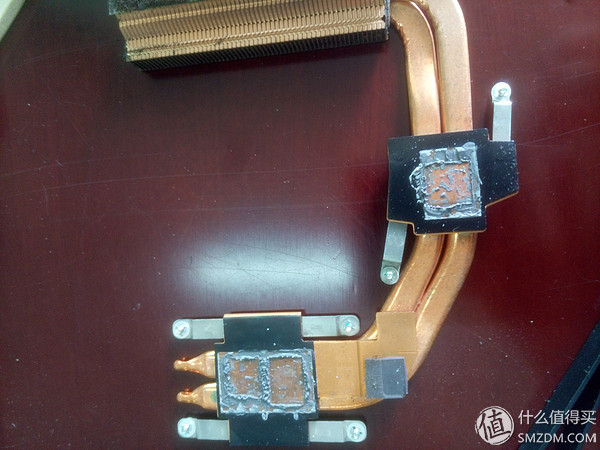
Unscrew the six fixing screws in sequence and the heat dissipating components are separated. The CPU and the display chip can be clearly seen. According to my experience, this silicone grease was not applied once. It should have been repainted once before. (This can be found from the fact that I have a broken screw and a screw on the D side.)

Artifact four, overclocking trisilicone, not to say the best, but the use of a bit better than the brand-name silicone grease.
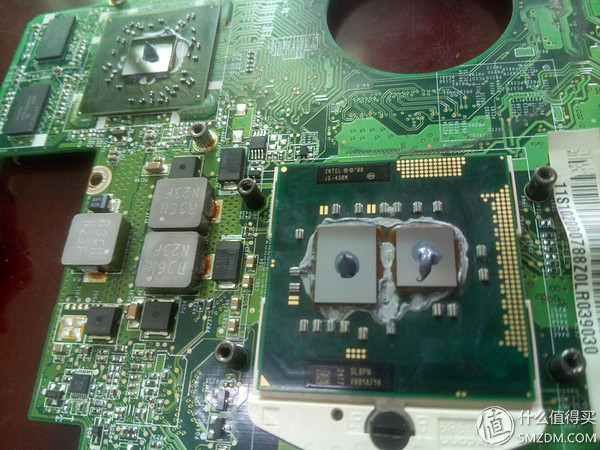 Three small beans
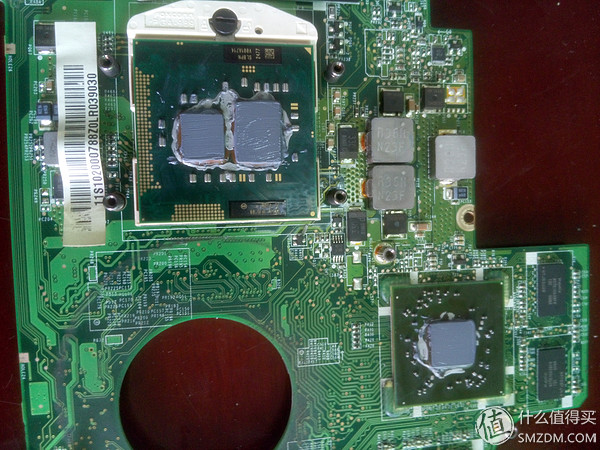 The level is limited, it can only be painted like this
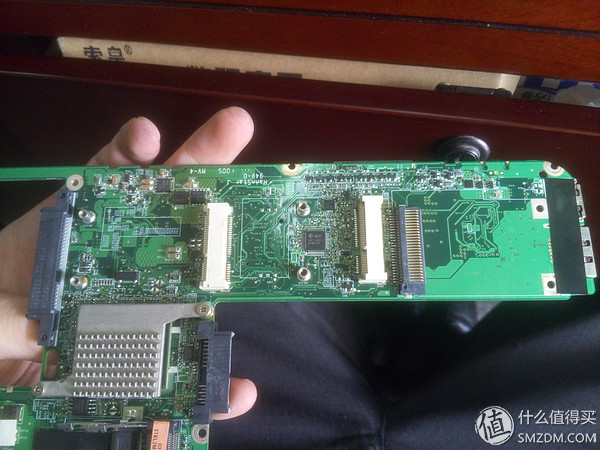
Put it back before suddenly found that the back actually still hidden a SSD interface, but also with a shielding cover, do a good job hidden, to be installed, then the motherboard must be removed to install, too inhumane. Dismantling cleaning plus silicone grease work here is basically over, followed by the original back and test machine.
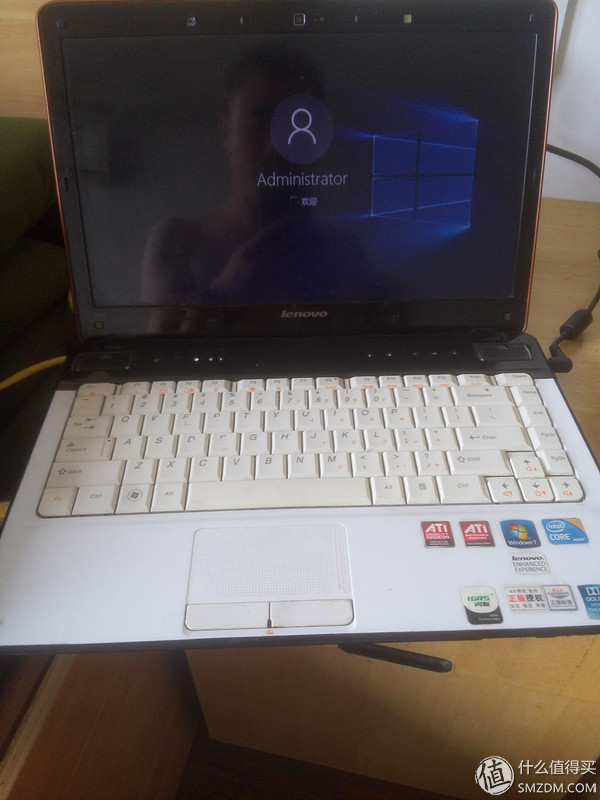 Finally you can boot up
There was a small episode here. After it was installed, it was turned on and turned on. The left horn was smoked instantly. I was so scared that I immediately lost power. I thought this was over, and my old driver would have to die in this Lenovo's hand! Re-unwrap it to re-connect the screws at the bottom of the mouth and re-connect the several screws at the bottom of the speaker. This time, after booting, I tried the next speaker. The volume on the left is very low. After the speaker is turned up, the speaker on the right side has a serious popping noise. I asked the next partner, saying that it may be a long time, and I always use the headphones. I don’t know. The big stone finally landed (when it was opened again, the heart was a little eager. The switch panel had forgotten to remove the screw and it was removed directly. The three nuts were glued back by the 502. There were still several small snaps in the teardown process, which did not affect. To sum up, the dismantling machine can't basically make non-destructive dismantling, but it's always a bit of damage to disassemble. Everyone must carefully disassemble to reduce the damage to the notebook.)
 Make up a map, give it back to a friend and let him take a look. Take a look and forget to take it before you take it.
Finally said that the next clean-up effect, did not clean up before the boot 80 degrees, slightly after the use of software to reach 90 degrees, open the game directly over 100 degrees crash or automatic restart. After the clean-up, 60 degrees are used, and 70 degrees are used lightly. It is expected that the cooling pad should be able to operate at 90 degrees for a long time. Has achieved the effect of enhancing heat dissipation. (Saying that some time ago, Aunt Zhang had disassemble the special feature. At that time, there was no time to catch up and missed a lot of gold coins.)
The circle of friends sent out an exploded view, and more than a few N partners asked to disassemble the machine in a flash. If there is free space, the dismantling machine will continue to be created. Thank you for your support!
OTG USB Flash Drive is one serial of USB flash drive,which is hot selling right now and widely used on different mobiles,including Iphone and all smart phones which can support OTG function.More and more people choose it since it is quite small and very easy to take with.
There are mainly 4 kinds of OTG USB flash drive as below:
1. 2 IN 1 USB flash drive with micro(or Android)

2. 2 IN 1 USB flash drive with type C.

3.2 IN 1 USB flash drive with lighting for Iphone.

4.3 IN 1 OR 4 IN 1 USB flash drive with lightning/micro/USB C.


Most OTG USB flash drives start with 8GB until 256GB.You may also look for 1TB 2TB OTG USB memory stick but you will find the 1TB 2TB OTG USB flash drive you bought not working soon when you want to save more and more files,or even some files are missing.Why? Because they are not real full capacity!
We only do real full capacity as promised,and no upgrade or fake capacity from us.
otg usb flash drive, otg usb flash drive for apple iphone, best 3 in 1 usb flash drive,best type c usb flash drive,4 in 1 usb memory stick
Shenzhen Konchang Electronic Technology Co.,Ltd , https://www.konchang.com