The old tree sprouts - TPLink TL-WR842ND old routing brush DD-WRT rack set to VPN server
This TPLINK TL-WR842ND was an antique a few years ago. It was because of the instability of wireless signals and the disconnection that often occurred. Because I am studying in Taiwan, many literature resources cannot be used without school IP. The VPN provided by the school is extremely unstable. Therefore, it decided to use the TL-WR842ND, which was otherwise idle, as a VPN server and convert the mainland IP into a Taiwanese school IP.
First, brush firmware selectionIn fact, for old routers such as the TL-WR842ND, there are few other third-party firmware support other than DD-WRT. In addition, DD-WRT also provides a number of practical features not provided by the original firmware, including the erection of a VPN server.
Firmware download
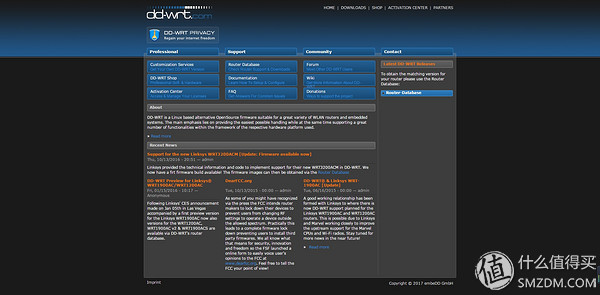
Visit DD-WRT official website as shown below.
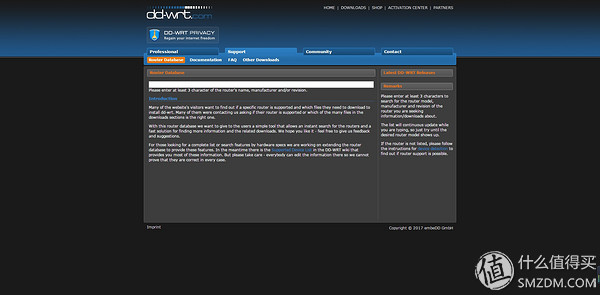
Click on the Router Database on the right to search for the model of your router in the page that appears. Of course, you can also find out by clicking on the Supported Device List below.
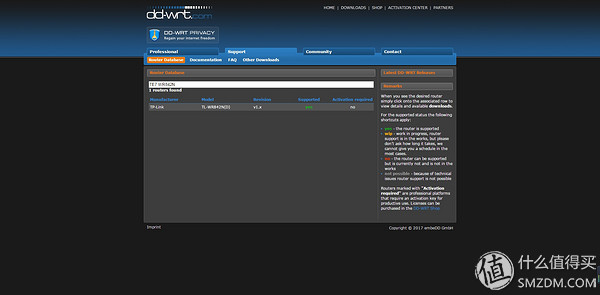
All supported router model list URLs If you can find your own router model, then congratulations, this shows that DD-WRT is to support your router. For example, my TL-WR842ND. It should be noted here that some route models will change because of different sales locations, and the firmware of different versions may be different. Please pay attention to the screening. Like my TL-WR842ND is 1.x version, it can not download V2 firmware.
 Then according to the firmware in the Router Database search for the corresponding firmware and download.
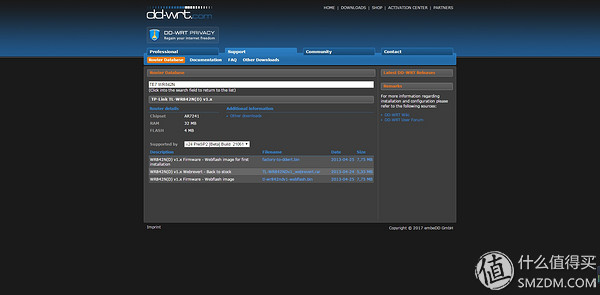
Just download the factory-to-ddwrt.bin and tl-wr842ndv1-webflash.bin files.
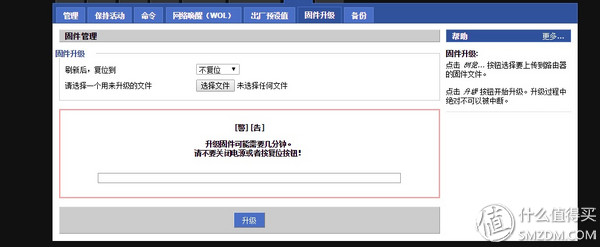
Second, brush stepLog in to the router management page (such as 192.168.0.1, etc.), find the firmware update option, select factory-to-ddwrt.bin, and start to flash.
After the brushing, you can find WIFI with DD-WRT as the SSID, and you can also connect the router with a wired connection.
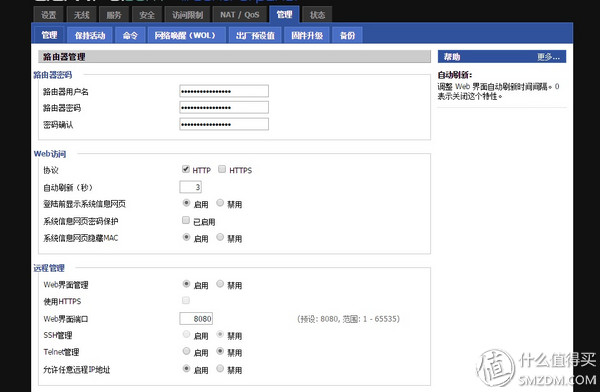
Log in to 192.168.1.1. The first time you log in to DD-WRT, you need to set a user name and password. This is the user name and password for logging in to the router remotely after you set up the VPN. It is very important to keep it in mind.
Then change the display language, select Chinese simplified in the Language Selection of Administration, can display Chinese.
In the final step, find the management firmware update page and swipe the firmware again. Select tl-wr842ndv1-webflash.bin this time and click Upgrade. The router will restart automatically after the machine is swiped.
At this point, the DD-WRT part of the brush has all been over, watching DD-WRT that dense set of options, is not there is a dazzling feeling ~ set up to set up the next VPN server.
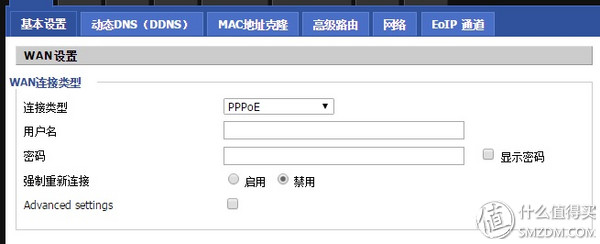
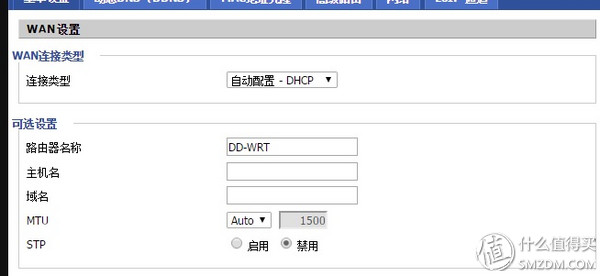
1. First of all, you need to connect your router to the Internet. In the Settings - Basic Settings, select your Internet access method. The common dial-up option is PPPoE. The company uses the internal network to select DHCP. My school's research office IP is assigned a fixed external network IP, so I set up a static IP.

2.DD-WRT can support two types of VPNs: PPTP and OpenVPN. Here I choose the simplest PPTP. Because the new Mac system does not support PPTP VPN connection, so wait for the next time to set up OpenVPN.
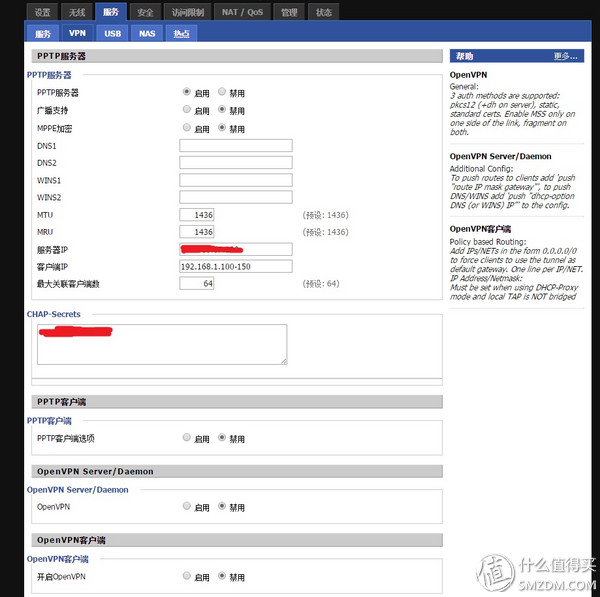
3. Select the VPN option in the service options to start the VPN server setup. Because I use static IP, it is very simple to set up, as shown below. CHAP-Secrets is the username and password for logging in to the VPN. Note that the format here is: Username Space * Space Password Space *. Click Apply. After the MPPE encryption option is turned on, there may be situations in which connection cannot be made, so I chose to close it here.
4. Since most users access the Internet through dynamic IP, you need to use another function DDNS in DDWRT to set. DD-WRT lists some commonly used dynamic domain name servers. Here you can select one of the usages in the list. I'm using 3322.org here.
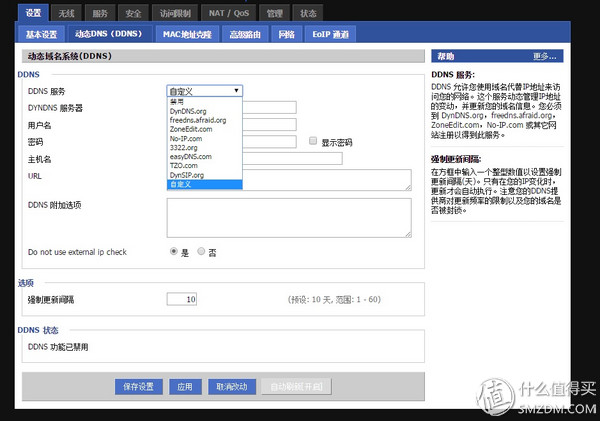
5. Register your dynamic domain name. Take 3322.org as an example, enter the official website to register account management. Create a dynamic domain name. Of course choose a free build on the line. After the establishment is complete, you can see your dynamic domain name and the current public IP address in the domain name list.

6. Now go back to your router interface and start setting up in the DDNS settings. The username and password are the passwords for your registered 3322.org account. The host name is your registered dynamic domain name.

7. Finally, after the "Web Interface Management" is enabled under the Administration - Administration page, you can remotely log in to your router by accessing your dynamic domain name.
At this point, all the VPN settings are all over. Start testing your results.
Third, VPN connectionFirst, use a computer to connect. Open the "Network and Sharing Center" - "Set Up a New Connection or Network" - "Connect to Workspace" - "Use My Internet Connection (VPN)" and enter the dynamic domain name you just registered into the "Internet Address" , "Target name" is filled casually (eg laboratory). Check the "Do not connect now" (because it will need to change settings), and finally fill in your login VPN user name and password, after doing this we can see a "laboratory" in the network connection, right click "Lab" properties, click on the "Security" tab to "VPN type" selected "Point-to-Point Tunneling Protocol (PPTP)" "Data encryption" to "Optional encryption (without encryption can also be connected)." After setting up to connect to your VPN, then you can... check out the data...

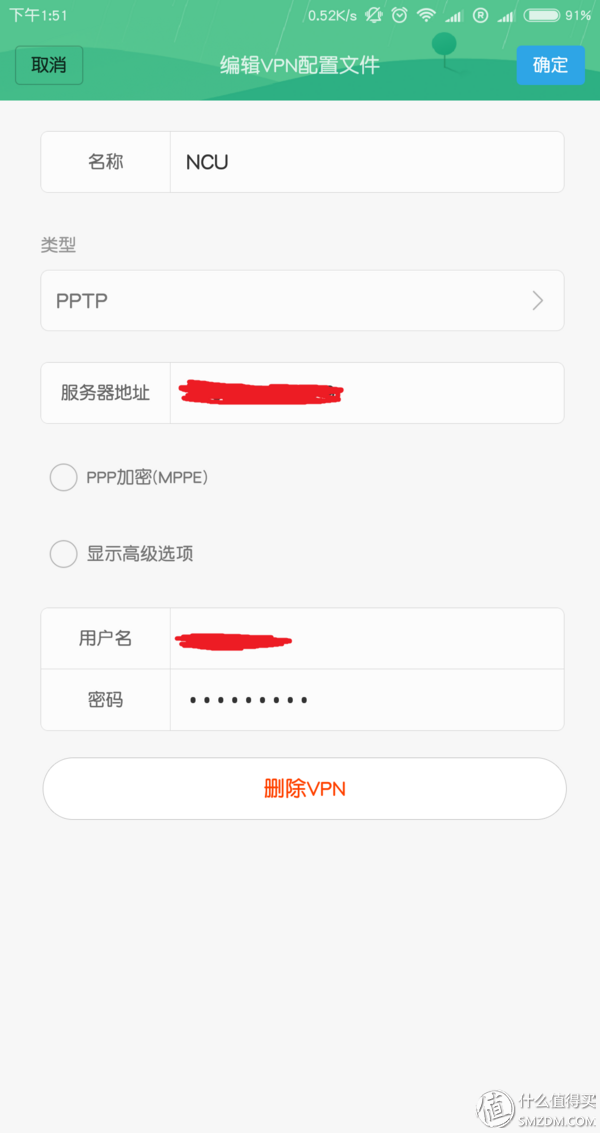
Mobile phone connection settings. Because you are using a PPTP connection, if you are upgrading to a new version of IOS, there is no way to use it. Android system settings are relatively simple. Take Mimi MIX as an example. Create a new VPN, type PPTP, server address or your dynamic domain name, username and password for the VPN user name and password you set. As for the PPP encryption option, because this option is turned off at the router end, there is no tick here.
After the connection is successful, you can see the options in the notification bar.

At this point, all tutorials for setting up a VPN server with DD-WRT are over. Later, you can use your company's computer to access your home's NAS through the VPN, the computer's resources. Something that you forgot to bring with you does not need to go back. Of course, other features of DD-WRT will explore on its own, such as OpenVPN. I wish you all the best!
Pv Combiner Box,Photovoltaic Combiner Box,Solar Power Combiner Box,Pv Array Combiner Box
Zhejiang Kaimin Electric Co., Ltd. , https://www.ckmineinverter.com